Thursday, February 21, 2013

New Encaustics, amidst the packing

I just returned from my Cabo girl's trip and I have to tell you, if you are stressing out, now is definitely the time for a vacation.  I'm feeling refreshed and ready to move... next Friday... Holy Crap now I'm stressed again. No really, it's all better.

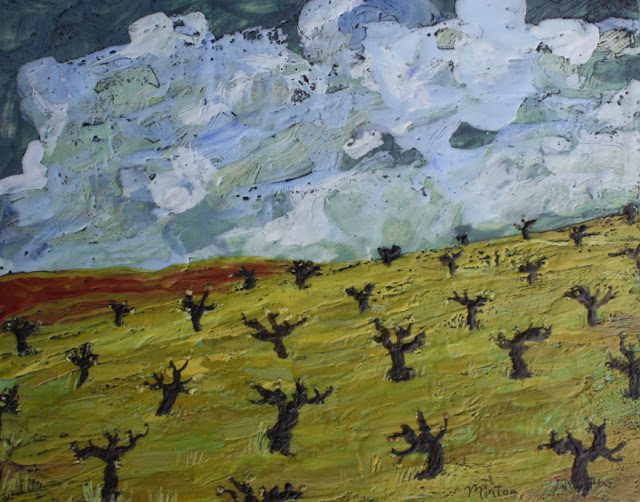
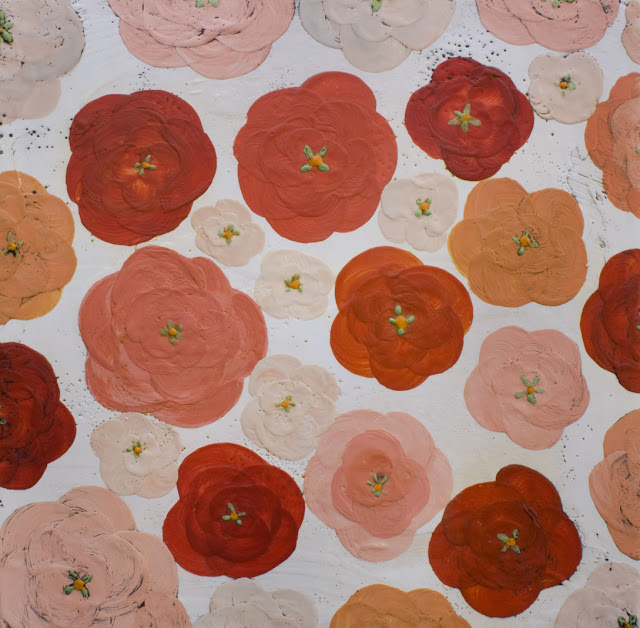
I finally got a good photo shoot in this week. Here are some of the pieces I am boxing because I'll leave them down here in S.D. for the Artwalk show.  I'm working on a few more large pieces that will round out this body of work and then do smaller pieces once I'm up in the beautiful north.  I'm pushing myself to get them done before the packing gets into full swing.

  "This Crazy Beautiful Life"  24 x 24  Encaustic on wood


 "Sweet and Fleeting"  11 x 14  Encaustic on wood


 "Moment in the Sun"  8 x 10  Encaustic on wood


"Listen"  8 x 10  Encaustic on wood


"Secret Garden" 11 x 14 Encaustic on wood

"One Summer Day"  8 x 10 Encaustic on wood

Thursday, January 31, 2013

Recent work, and Moving News

It's been a little while since my last post so here's an update for ya, Montana we're coming back! Yep, Daniel's company needs him up there more frequently than the monthly trips so we are moving... again. This doesn't stress me out or anything... especially since the Artwalk show is fast approaching! So, my to do list grows long while I am waiting for the temperature to creep up in the studio this morning...

So many things to do!
Pack
Clean
Pack for my girls trip to Cabo (YES, so needed right now but I don't have time to relax do I? yes always make time says Daniel, my relaxing guru)
Figure out the logistics of moving cars and stuff
Figure out the logistics of getting myself in the studio as much as possible so I can be ready for my ARTwalk show in Little Italy April 28th
Paint
Paint
Paint!
Find daycare for my kiddo in MT (so far this is the hardest thing)


and in the meantime, doing all the little mama, hairbrained odd jobs that seem to never end ;)
but I finally finished this piece which ended up taking a few more months than expected, phew!
Love it though.

 Sometimes its so hard to sell these more intricate works, you want to look at them for a year first.

 These three little paintings are so juicy. Loving the orangey red tones.

I've done about 50 monoprints in the last month and this one is my current fav.
Mountains baby!

 I did a few like this, I suppose it's time for a large format photo shoot because this photo is terrible

 This one might get put into my Studio Sale area on the website, I'll see if any more
come out like it first though. Classic Minton right? ;)

 This is the big mama I'm workin' on right now. Just stuffing it with blooms.

Many more in the works, but they aren't ready for their close up yet.


Let's see, what else is new.... Jolie is turning 5 soon, which blows my mind, she is such a fun kid, she falls asleep with every last children's book we own. I think she's trying to teach herself how to read by osmosis. Sometimes she wakes us up in the middle of the night shouting "MORE BOOKS!" 
 Which reminds me I need to write that on the to do list :-)


Speaking of Children's Books,  check out my friend Amelie's children's book site, Amelie's Bookshelf  I love reading her book reviews for suggestions on what to get for Jolie

Until next time... Thanks for reading folks!


Thursday, January 17, 2013

Encaustic Mono Prints

Just before Christmas, I got addicted starting learning how to do a mono printing process with encaustics. Here is a peek at the latest prints. I am doing as many as possible in preparation for Artwalk.   The reason I started looking into doing these, was because I wanted to offer an affordable print alternative to prospective buyers. Encaustics are expensive, and a large investment for most folks, and I've noticed that many artists offer limited edition prints, but... if I think about it,  I would personally much rather have an original piece than a digital print if possible, so I started experimenting with this process as a way to do that. I have been using all sorts of handmade papers to try and hit on the one I like the best but it's tricky, and so far the best is a japanese rice paper traditionally used for painting with ink.  Here's a step by step photo guide of what the mono print process involves:


 An anodized aluminum plate is placed on the heated palette and the
painting is done straight onto the plate.

 
 A sheet of paper is cut to size and carefully placed over the heated wax paints
and the paint is pressed into the paper.


 Voila! Beautiful, frameable, encaustic paintings on paper!


Thursday, December 20, 2012

Christmas Blooms  10 x 10 encaustic on wood

Merry Christmas and Happy Holidays 

from Karen Minton Creative! 


I just wanted to say thank you to all my collectors and new buyers this year. It's been an amazingly fun year and I hope to bring you much more in 2013.  I'm working on diversifying my business, creating print options and expanding my encaustic practice into larger sizes and bigger bodies of work. My most recent and exciting news is that I was accepted into the Mission Federal Juried Artwalk  on April 27th and 28th! I'm going to be working hard this spring to create a beautiful booth filled with artwork that I hope will touch everyone who can come see it.

May you all have a blessed holiday season,

Karen


Saturday, December 1, 2012

The Great Christmas Giveaway

That's right, just in time for Christmas it's a fantastic


The first drawing will be for this original encaustic painting.

Rolling Hills 8 x 8 Encaustic on cradled wood board

The second drawing will be for this hand painted Christmas ornament 
featured in my last How To post.


I will draw for the winner on Dec. 12th. Make sure you provide a way for me to contact you in your comment. I will announce the winners here and on my Facebook page.

Contest Guidelines,  Please READ

Do one or all of these things then leave a comment here or on my facebook page telling me what you did. If you don't leave the comment I can't put your entry in.

1. Pin any photo of my paintings from this blog or karenminton.com to Pinterest with a description/title and "by Karen Minton" credit. Each pin gets you an entry!!! Pin as many times as you want
2. Share this giveaway on your Facebook page, blog or other online network. This'll getcha 5 entries!
3. Subscribe to this blog (add your email to the subscribe form down on the left). 1 entry.
4. If you are new to my facebook page, "Like" it. (only new likes will be entered this time).
5. Get a friend to "Like" my Facebook page. 2 Entries

Boost your chances of winning! Get 10 extra entries if you buy a painting from the works for sale page on karenminton.com.

Good Luck my friends!


*** If Winning contestant's shipping charges exceed 15$ they will be required to pay remaining shipping, if declined a new winner will be drawn***


And the Winners are: Jen Hess Mouat for the ornament and Amelie Dawson for the painting!
Thanks everyone for entering, sharing, pinning, liking and spreading the love!


Thursday, November 29, 2012

Using paperclay


Tools you'll need:


Paperclay (from Amazon)
Gesso
Cardboard
Scissors
Sculpting tools
Acrylic paint
Slowblend medium (optiona but nice to have)
Paintbrushes (nice tiny ones for painting little details and a mid sized one for the paperclay)
Polyurethane varnish, satin (optional)
Hanging tools (eye screws, u shaped nails curved wire etc). 
Ribbon, yarn, string or fishing twine to hang it with
Glue
water


Step 1
Gesso a piece of cardboard, let it dry, then pencil out the shape you want. Cut it out. Take your paperclay and roll a long strip out to fit the piece.


 Step 2
Take a sharp sculpting tool and score the inside edge of the paperclay roll and both ends. Add a little water to the scored areas by running your paintbrush over it.This will help it stick together.


Step 3.
Join the paperclay to the cardboard by using a sculpting tool to smooth both sides of the paperclay roll to the top and bottom of the cardboard. Go over it with a dampened paintbrush to stick the clay to the cardboard if it gets too dry. Don't get it too wet or it will take longer to dry.


Step 4.
Finish the design. For this one I used a pointed sculpting tool to draw little textured
swirls into the clay. I went go over it with a dampened paintbrush to soften the texture. Remember
not to over think it or try to get too detailed. All the little bumps and cracks will add to the charm of the finished piece and you're not trying for a machine made look here, it's supposed to look hand made.


 Step 5.
Add your hanging tool. Reenforce it with glue. Other options are to glue the hanging wire/yarn/string to the back.


Step 6.
Let the piece thoroughly dry, then gesso the whole thing.


Step 7.  (Optional)  
Paint an undercoating. I like to use an orangey brown, or light orange. Make sure to get that color into all the deep cracks and divots as it will peep through later. The deeper the undercoating color the darker your piece will appear when it's done. If you want it really light and bright then skip the undercoating entirely.


Step 8.  
Paint your painting, the best part :) I've done scenes I think will be meaningful for the person I'm giving it to. Another idea would be portraits of your family, favorite pets, places or things, important dates, messages or names...


Step 9.  
Paint the frame part with a nice shiny gold or silver. Then you can varnish the whole piece after it dries to make it a bit more indestructible (I'd do that for a magnet, skip it for an ornament).


Step 10
Sign the back, attach the string, hang and enjoy. 


Then go make more because they're so adorable!


Next post is the Great Christmas Giveaway!
It's going to be crazy good!


Tuesday, November 27, 2012

Waxy Days of Winter


 It's winter in San Diego so it's something like 60 degrees outside right now. The tree outside my studio door is doing this...
 So awesome. 

So anyway, after a long break from painting (a sick kid and a holiday will do that to you) I'm itching to get back in the studio. Today I busied myself getting Christmas projects in order, prepping wood boards for painting and finishing up this big tropical commission.

Dream Journey  Commission 32 x 64 acrylic on canvas

Also I am putting together a fun "how to" post for artsy Christmas gift lovers, which will be followed by a nice little giveaway.

And while I'm at it, here are a few more photos of recent work:


 Love Blooms 18 x 24 Encaustic on wood


 Budbreak 8 x 10 Encaustic on wood


  closeup: The Old Farm 8 x 10 Encaustic on wood


 Hija 16 x 20 Encaustic on wood 


Lost Garden 11 x 14 Encaustic on panel


Thorny Roses 8 x 10 Encaustic on wood


 Everything's Rosy 10 x 10 Encaustic on panel